Training Seminar 12 - Water Cycle Infill Development
Instructions
As part of its functionality, the Scenario Tool models the performance of different urban form scenarios through the lens of the urban water cycle and urban heat island effect – residential subdivision, or more broadly infill development, falls within this scope. The tool has multiple ways of simulating infill development, with units, townhouses and apartments all being able to be characterised by the model. The rate at which these housing typologies are generated is a factor of a region’s population projections and planning regulations. In this seminar, we distribute new households into different land use zones on the basis of future infill development, producing a change in the residential urban form and allowing us to quantify the impact this has on urban heat metrics.
The tutorial will use the land surface and water balance model to
Assess the current urban water balance and heat island effect
Assess the impacts of urban development in a sub catchment and potential mitigation strategies
Note: none of the data or modelling specifications included within this training exercise are reflective of any real-world initiatives by government authority or any other organisation.
Preparation
Before beginning, use the link to this Dropbox folder to access the GIS files employed as part of this case study and download them to your computer.
To start, navigate to https://www.wsc-scenario.org.au/ and click on ‘Register’ if you haven’t done so yet (note: you’ll have to re-register for the tool here if you had previously registered for an older iteration of the tool).
Log in using your registration details. You will be taken to the project dashboard – hit the plus button to bring up the new project setup window. Enter a name for your project, and select Melbourne from the dropdown menu for your region. Then click ‘Next’.
Urban Water Cycle
Model Setup
Create a new project and select the Melbourne Region
Select a simple data model
- Select the assessment models in following order
Land Surface Temperature
Water Cycle Model
Upload boundary provided in the data pack
Confirm and submit the simulation. Note the area is quite large and the model will take about 10min to setup
Note
If you would like to run TARGET we recommend to increase the grid size to 50m since the area is quite large.
Business as usual 2051
Setting Up a Scenario
For this seminar we will simulate an increase of the population by 40% or 1300 households.
The population will be distributed in the general residential zone (GRZ) and neighbourhood residential zone (NRZ) simulating typical development patterns for Melbourne. (see below)
NRZ
Development Type |
Additional Households |
Side by Side |
200 |
Townhouse |
300 |
GRZ
Development Type |
Additional Households |
Side by Side |
200 |
Townhouse |
400 |
Apartment |
200 |
We will explore 4 scenarios
A BAU scenario without water reuse
A RWHT scenario
A SWH scenario using stormwater runoff to provide water to the sporting oval
BAU
First, upload the NRZ and GRZ zoning provided in the data pack. Next, create a new BAU scenario and add the following nodes. You can find the nodes under the Urban From tab. You can find the workflow in the data pack.
Parent scenario: Baseline
- Workflow node: Side by Side
Area: NRZ
additional households: 200
hard stand fraction: 0.6
- Workflow node: Townhouse
Area: NRZ
additional households: 300
hard stand fraction: 0.6
- Workflow node: Side by Side
Area: GRZ
additional households: 200
hard stand fraction: 0.6
- Workflow node: Townhouse
Area: GRZ
additional households: 400
hard stand fraction: 0.6
- Workflow node: Apartment
Area: GRZ
additional households: 200
hard stand fraction: 0.6

RWHT
Setup a new scenario derived from BAU and assign a RWHT tank to all buildings
Parent scenario: BAU
- Workflow node: Lot Scale Storage
Area: Case Study
Inflow: roof runoff
Demand Priority 1: non potable demand
Demand Priority 2: outdoor demand
Demand Priority 3: -
Storage Volume (m3): 5
SWH
Setup a new scenario derived from BAU and assign. To setup the SWH system add 2 new areas one defining the harvesting catchment the other defining the oval (see below)
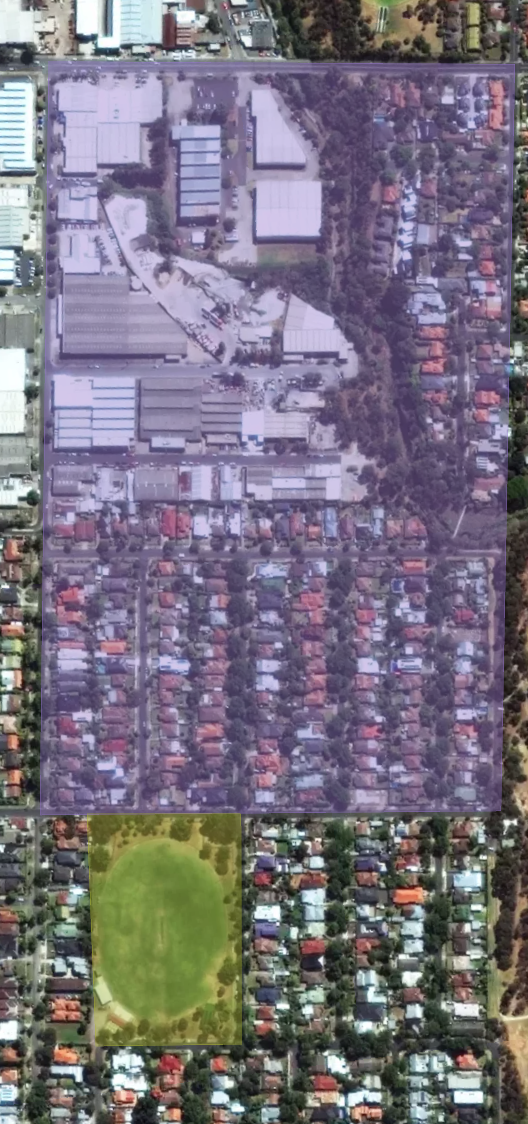
For the setup the outdoor demand needs to be made available at lot scale. Therefore create new lot template And assign the outdoor demand to outdoor demand. Now the sub catchments and storages can be defined as shown below.
Parent scenario: BAU
- Workflow node: Lot Template
Area: Case Study
outdoor demand -> : outdoor demand
All other values are default
- Workflow node: Sub Catchment
Area: Stormwater Harvesting
Stream: storm water
- Workflow node: Sub Catchment
Area: Sporting Oval
Stream: outdoor demand
- Workflow node:Sub Catchment Storage
Area: Case study area
Sub Catchment Inflow: Stormwater Harvesting
Stream: storm water
Sub Catchment Demand ID Priority 1: Sporting Oval
Stream: outdoor demand
Storage Volume: 50
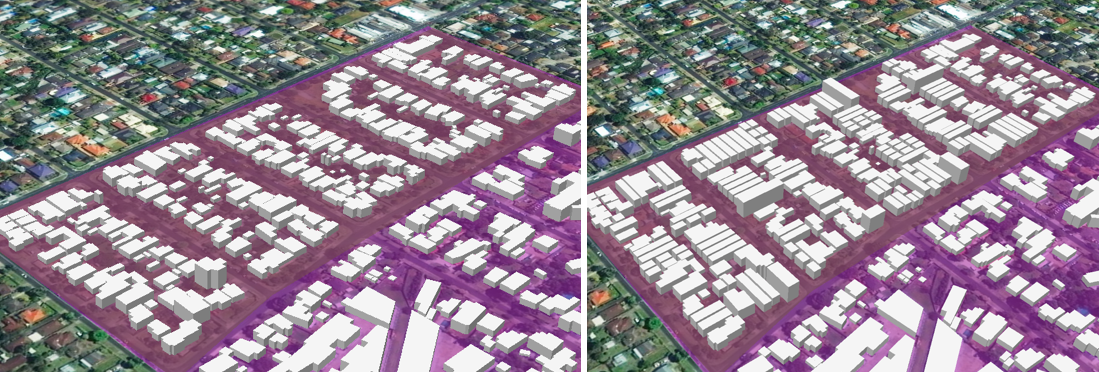
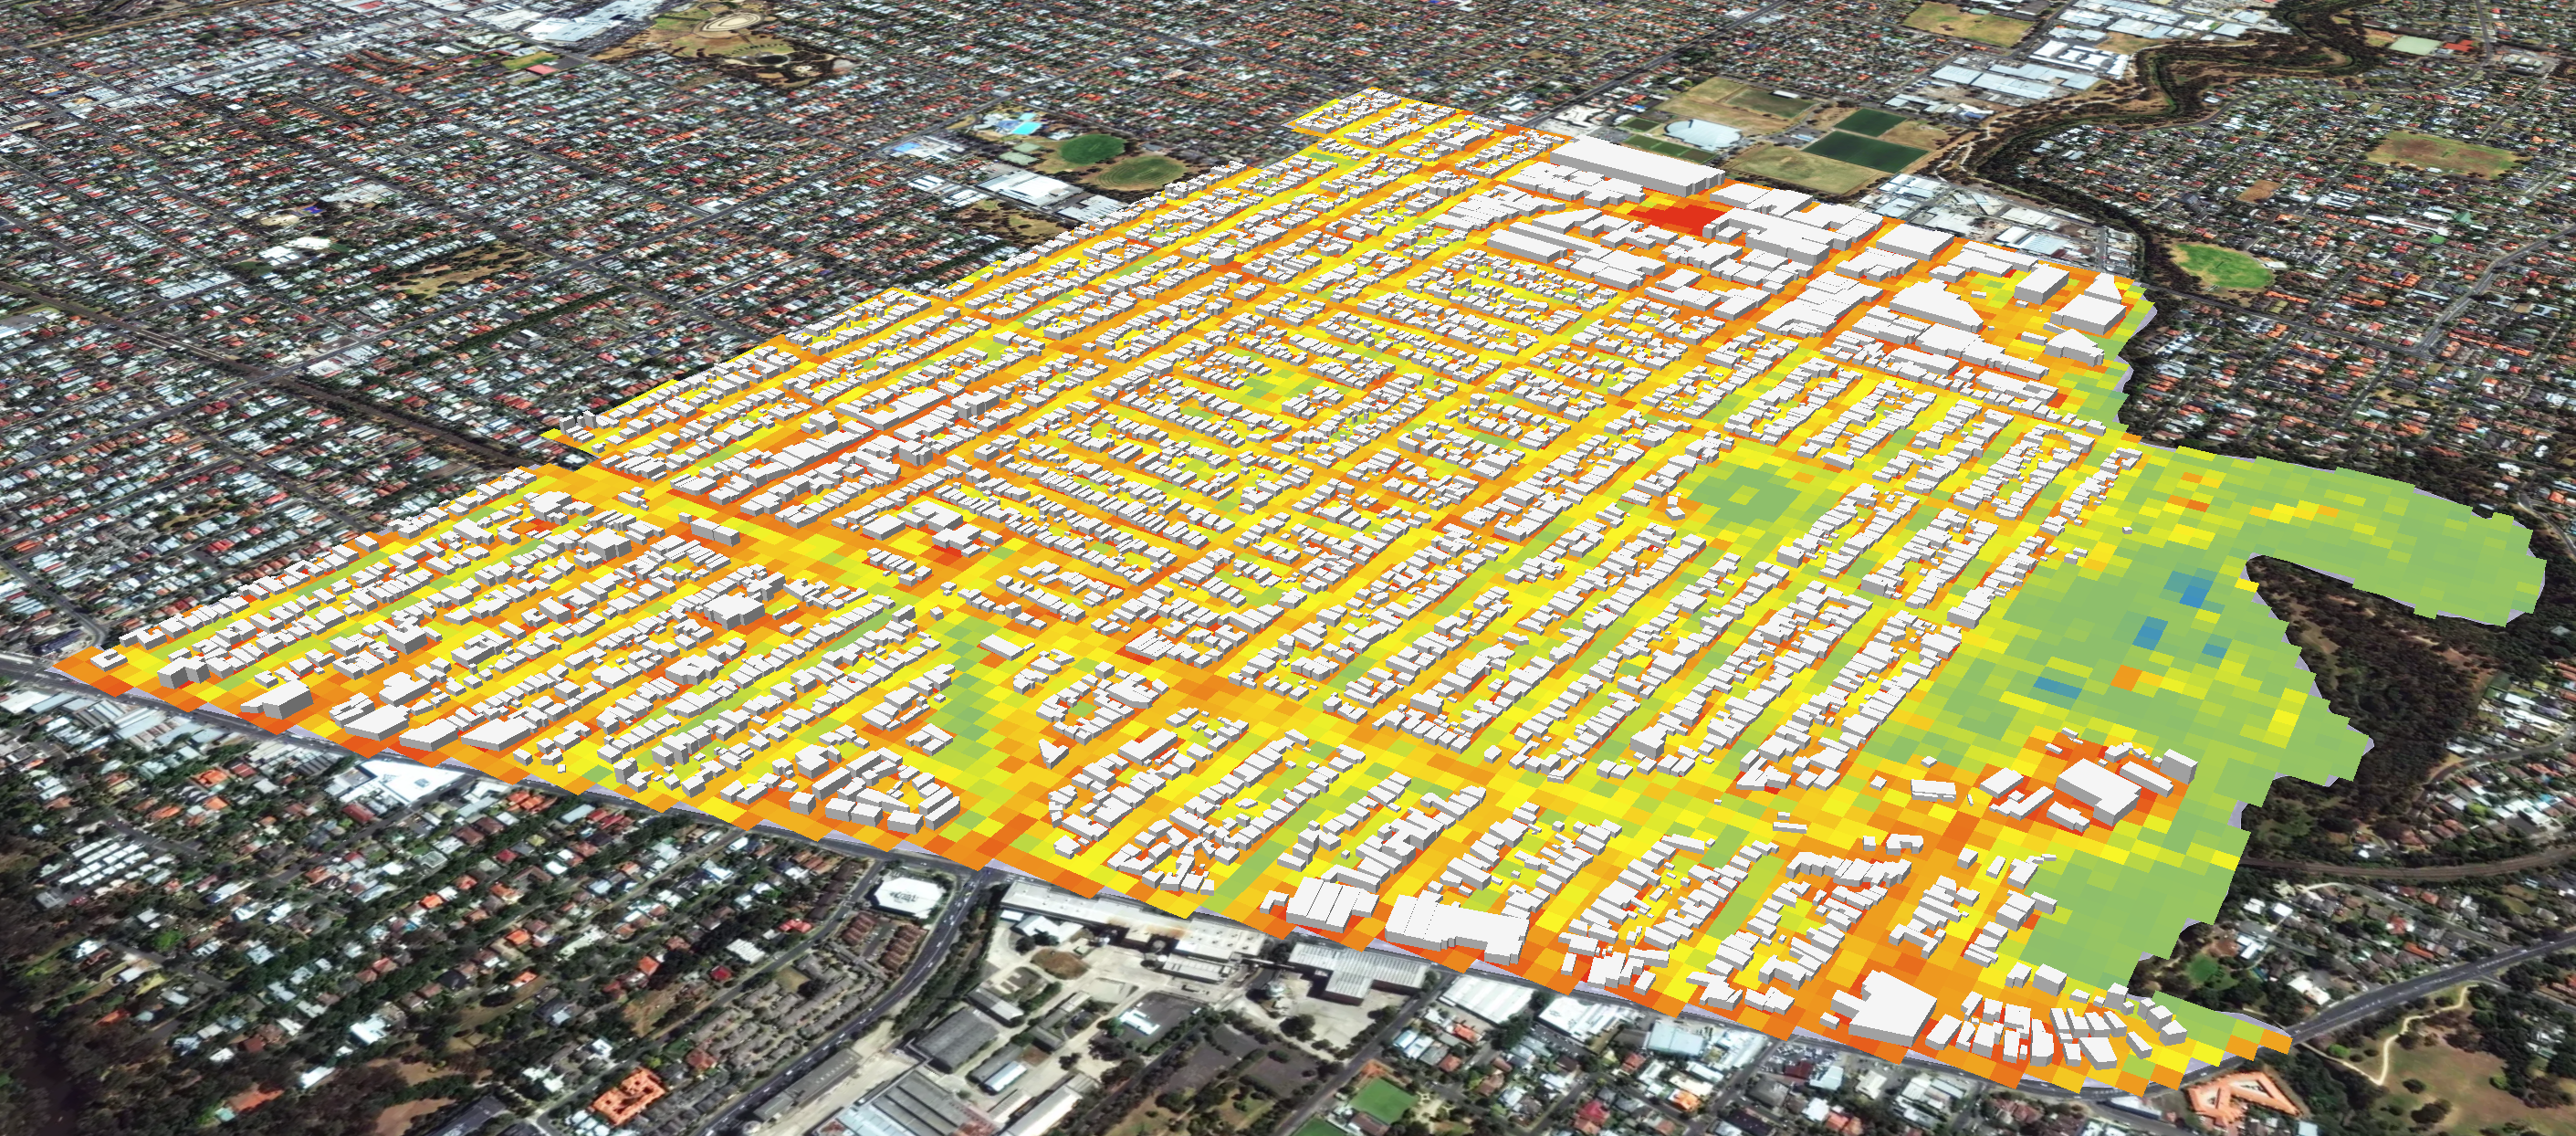
Viewing the Results
After the scenarios have been executed explore the impacts of the 3 different scenarios.